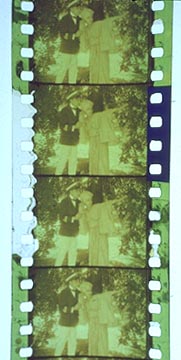
Damages to Perforations
The film is driven through most machinery by means of the perforations, which also hold the film stationary in a precise position in a camera or projector gate. Many modern processing machines do not use sprocket drive at all, and increasingly telecine and other devices use capstan drive and do not rely on the perforation for drive but only for synchronising. However, this is a recent development and in the past, the strain on the film perforations was continuous from every form of transport system. The edges of perforations first burr, then are bent and distorted and ultimately tear. Burrs and minor damage may cause film to be transported unsteadily and the image to jump or vibrate. Tears can be quite slight, just a millimetre or so along the length of the film path from the corner or the centre of the leading edge and are caused by a single violent stress during drive. These tears, sometimes called split perforations or "crows feet" [photos?], often have no effect on the image steadiness but are a potential weakness of the film that could result in a further serious tear in the future. Tears that are more drastic can occur where entire sections of perforations are pulled entirely away.
Repairs to perforations
If the damaged perforations are well repaired, the film will run through a printer without any problems and maintain a stable image. Further passes of minor split perforations through a printer or projector may transform these tears into breaks. Considerable experience is needed to evaluate whether repair is worthwhile. It is usual to repair as little as possible - just sufficient to enable the film to be printed.
Some modern printers do not require perforations on both sides of the film in order to transport film steadily, and some printers notably the Sigma and the BHP Modular, and the Rank Cintel telecine, are reported not to need perforations at all for short lengths provided there are no distorted turned up edges. This reduces considerably the effort needed to prepare a damaged film for printing,
 Perforated adhesive tape
[one brand is known as Perfix] is available that covers only the perforations
of 35mm or 16mm, as wide as the outside margin plus the perforation. It is
available in both clear and opaque versions. Usually this tape is designed to
be used with special equipment for applying it automatically along long lengths
of film but it is essential to cut away any distorted cut or torn edges to
allow the Perfix to lie flat. Such equipment cannot be used for shrunk film if the
shrinkage is more than about 0.5% especially if the length of damage is more
than a few frames. These tapes can be applied by hand with experience but on
severely shrunk film, it is best applied on frame length at a time.
It is often advisable to apply the tape to both the emulsion side as well as the base side in order to hold down the inevitable hidden projecting edges that are a feature of split perforation.
A method widely used and especially limited to the repair of archival film [most Perfix is used for the repair of modern film]. A length of damaged perforations can be substituted with another length of perforations cut from a length of good [but similarly shrunken if necessary] film. A run of perforations that is longer than the missing run by two perforations is matched to the missing section. The new good length is cemented to the archive film using suitable cement [see below]. The good length overlaps and is cemented on to the two healthy perforations, one at each end of the damaged section. The two ends are cemented base-to-base, thus avoiding having to remove the emulsion (to which the cement does not adhere). The extra thickness of this system is the usual cause of any problems and limits the printers that can be used. Some technicians use tape over the leading edges of these cemented mends to reduce the risk of edges being caught in the printer.
A method used as a temporary means of restoring perforations uses adhesive splicing tape and a perforating tape splicer, such as is mentioned below. A tape is applied across a damaged section, without cutting the film, just overlaying the transparent tape on both sides. The tape sticks to itself, and creates the missing film area. The tape splicer is then used to punch the perforations through the splicing tape. This requires a well-maintained splicer with sharp perforation cutters. Any tape covering the image can be peeled away if necessary but is often left and barely affects the image quality if it is only on a single frame. The advantages of this are the precision of the method and the speed - the disadvantage is that the tape should be removed after printing to avoid the adhesive spread in the archive in time.