Sight Grading
Sight grading is carried out on a rewind table using a magnifying eyeglass or loupe, some method of cueing and the eye. The table has a light box over which the film is wound and examined using the eyeglass.
What is Grading? It is the evaluation of a piece of film usually a negative but not necessarily, and deciding how much exposure that negative requires to give the result we require on the screen when we make a print from it.
What is the result we require on the screen?
Well usually, we require a picture that achieves the maximum gradation on the screen. That is it has the maximum detail in the shadows and highlights of the picture. We say usually because some times we do not want the maximum detail in the picture. For example, if we have a negative that has been shot what is normally called, Day for Night we do not want detail in the shadows. There might not be enough light for scenes to be shot at night so that the camera operator will shoot the scene during the day but underexpose the film so that a thin negative results and there will be no shadow detail. The grader can then print that negative so that the print looks dark and it will look like night.
We look at the negative and try to remember how much detail we have in the shadows and highlights.
We are trying to produce a print that has maximum gradation unless we have other instructions or are able to tell that a shot is a night scene.
If a new feature is being graded then when the first print is being made the grader will have the benefit of the Director and/or editor to advise him how the film should be graded and whether there are night scenes and any other details
If we are having to grade a film made 60, 70 or 80 years ago we will not have the director available, we might have who ever ordered the film saying how the film should be graded but usually we have to make are own decisions about the grading. Sometimes until you see the first attempt, you will not realise that some scenes need special treatment. A good and experienced sight grader should produce an acceptable print first time most times.
So what is the sight grader doing?
He is examining a number of frames from each scene by means of his glass. Probably a frame near the start, one in the middle and one near the end of the shot. We have to look at the frame and decide how much detail there is in the dark areas of the frame, how much detail there is in the light areas of the frame and if there are people in the frame how dense are the skin tones. Of course when considering the flesh tone we have to remember that we do not know how dark or light the persons facial tones are, but as a general guide to the density of the scene it is a good parameter. So how do we decide how much detail there is? We are comparing the scene in front us with the mental pictures locked into our brain of what a scene looks like at each of the lights we use to print. A good grader should be 90% right with light values between 18 and 28, not 100% because things like a matted negative or one with a high base density or a very high contrast negative can cause problems. At lights above 28, the black areas are becoming denser that we have more difficulty distinguishing between them. This difficulty increases as we get higher up the scale where the grading accuracy will fall. We would expect about 80% accuracy between 29 and 40 and probably 60% from 41 to 50. You will find that the lights below 18 are used much less frequently because it is not possible to get an acceptable black from such low exposure, the main use for these low lights is where it is more important to see detail than to have good picture quality. For example in newsreels the camera operator not always has sufficient light to correctly expose his film resulting in a thin negative. He needs all the detail so a picture with grey shadows and highlight detail is acceptable. Such a result would not be acceptable in a feature film. As we get beyond light 32 you would tend to grade in 2-point intervals, so you would look at the scene and decide between say 34 and 36. If you cannot make up your mind as can happen you can give the scene 35. As you get up towards 50 it is very difficult to decide the light and we are reaching the point of dare we say it guesswork! We need to be within a point or two of the correct light for the result to look right on the screen.
It should be obvious that in order to grade consistently we must be able to examine the film over a constant light source. The brightness or even colour of the light source is not important other than it must be what suits the grader. You just have to adjust the light to whatever suits you. It causes great problems if you break your opal glass and the next piece is different, it usually means tests to be sure you are grading correctly. Moving to another bench can cause great difficulty.
The other key to good sight grading, to all grading in fact, is a consistent printer and process set-up. You have to be sure that if you give a scene light 25 today and you give the same scene the same light next year you will get an identical result on the screen. Some graders have been known grade a reel and then do a test at various voltages on the printer lamp view the test and decide what at voltage to print the reel. This is a recipe for failure. You will never learn to grade or have the confidence to grade. You just have to get your brain library of images firmly fixed and then you can turn out good work consistently. The same applies to producing prints for different applications. We are asked for TV graded prints or theatrically graded prints. We are not really talking about different grading but different sensitometric characteristics for the print. If the customer likes the print to be say 2 points light then we still have to grade the negative normally and then make a correction on the printer. You could grade normally and then subtract 2 points but it just makes grading more difficult and probably destroys your concentration. Also if you want to make a normal print later you have to reverse the procedure, provided you remember or have noted that you took off two points.
So we are continuing through the reel continually balancing the highlight, shadow and flesh tone details in our assessment of the scenes. As an example, we might have a head that is quite dense against a light background. We have to decide whether to produce a face with normal detail against a dark background by using a high light value or to produce a lighter face against a normal background. Unless we have had advice, we have to decide by evaluating the previous and perhaps following scenes. It could be that the scene is a person with their face illuminated by a lamp in a dark room so the first option would be correct. Otherwise, it might be the person standing near a window so that we can let the face burn out in order to have normal detail in the room. If the previous scene had established that we have a window with sunlight streaming in then the mind would accept the lighter flesh tone on the screen.
The most difficult shots for a grader are shots where the density changes from one end of the shot to the other. For example, a tracking shot that moves from a sunlight exterior to an interior without the camera operator making exposure changes during the shot. The same can apply when we are faced with a cut-in dissolve that goes from an exterior to an interior. We then have to put a light change in the middle of the shot that will probably be noticed or have one end right and the other end wrong. We might end up with the exterior the right density and the interior too dark or the interior correct and the exterior too light. In all cases the purpose of grading is to make sure we have a print where all the shots match without the eye being conscious of the scene being too light or too dark. The viewer should not be aware of any grading changes.
|
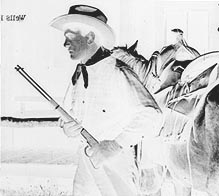
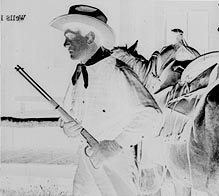
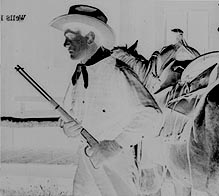
Three examples of negative images, having three different, increasing densities. In order to have a good result on positive, they must receive a different exposure: they must be graded differently. |
|
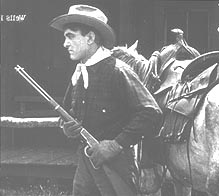
Here you can see six different
frames. They all come from the same negative, but they were exposed
differently. For a normal theatrical print, exposure number 3 is the correct
one. |
The major problem that can arise with grading is when a print ends up with Wrong Lights. This is where the scene has not received the light specified by the grader. This can be due to the grader writing down the wrong number, making an error when punching a band or chart or the most serious case when the printing machine misses a cue or adds a cue. A missed cue can occur because a notch is too shallow, an RFQ has come off or just a fault in the machine. A split in the negative can cause an extra light change and a small piece of RFQ tape stuck on the film can do the same. Whatever the cause the result will be one or more scenes getting the wrong light. If the error occurs at the start of the reel then most of the reel could be unusable. It can take quite a while to find the problem.
Let us briefly mention how a sight grader is trained. Much practice! Obviously, the difficulty in a commercial lab is that you cannot just let the trainee keep making prints, print stock is expensive. The usual way is for the trainee to first spend a week or so with an experienced grader watching him work and listening to him explaining what he is doing and generally helping by cutting bands or writing cards. He has to learn the mechanics of cueing and grading. The next stage is to try grading some reels. The experienced grader can then run through the reel and explain where the trainee has gone wrong and why he has gone wrong. Once the trainee has a feel for grading the best training is to do grading alterations. For example, newsreels are quite difficult to grade sometimes requiring corrections. The trainee can then grade the job himself, compare his lights to the actual lights, and then see what the result was on the print. The other very important part of the training is to look at as much film on the screen as possible preferably with the grader who graded the film. Part of the make-up of a good grader is the ability to accept criticism of his work, when viewing an answer print with the client and they ask for alterations you have to try to understand why he wants it that way.