
|
Brian R Pritchard Motion Picture and Film Archive Consultant
|
|
Film Grading |
If you are interested in Grading you might also be interested in the page on Cueing.
Colour Grading using an Additive Head: A diagram illustrating how the colour is changed when grading with an additive colour head for both Neg/Pos grading and Reversal grading.
Every piece of film that is printed needs to have an exposure level so that the resultant printed material is of the correct colour or density. It must not be too light or too dark. The process of determining the exposure level we call GRADING in Europe and TIMING in the USA.
There are several different methods of grading:
1. Sight Grading .
2. Analyser .
3. Densitometric Grading
4. Grading by Scene Testing.
The advantages of the four systems are:
The Disadvantages of the four systems are:
There are some definitions that have to be given in order to understand grading.
The Printer Point is the basic unit of grading. The unit used now is the Bell and Howell Printer Point. The technical definition is that a one-point change is equivalent to altering the exposure by 0.25 Log Exposure. This means that the amount of light doubles for every twelve-printer points. Twelve points is equal to one camera stop. In the past virtually every printer manufacturer had a different system of printer points. The Debrie had a range of 20 Points. The Bell and Howell Model D and J Printers had 22 point range. The Lawley had 11 points but the larger the number meant less light, the opposite to most other printers.
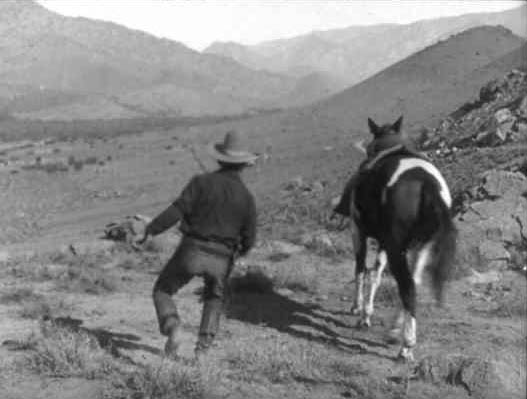
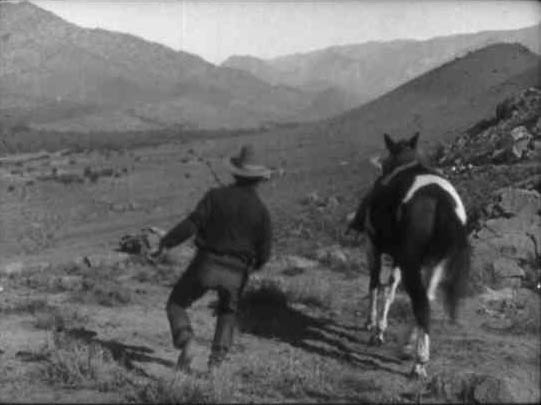
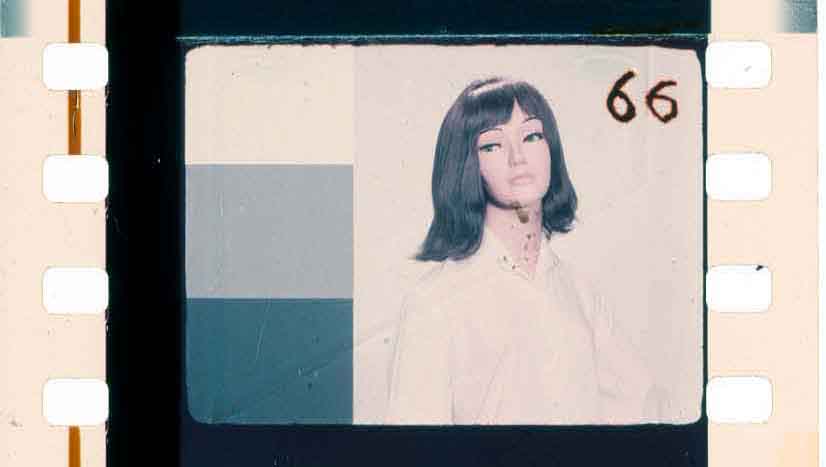
These 3 frames were printed at Lt 5, 15 and 20 on a Debrie Matipo.
All modern printers use the Bell and Howell printer point system and usually have a range of lights from 1 to 50. They also have a trim control calibrated from 1 to 22. This allows the whole scale to shift by up to 22 points. The trims are usually used to compensate for the different speeds of the different stocks.
The method by which the grader communicates with the printing machine is called a cue. As well as telling the printing machine where the light change is wanted it has to be told the value of the exposure or the printing light. This is done by a band or chart.
The simple definition of correct exposure is the result on the screen that the customer likes. However a more scientifically useful definition is that the picture being viewed has the maximum detail in both the shadows and highlights and is of the correct contrast, of course, the customer is paying the bill so this might not be what he wants and what he wants has to be produced. If we are dealing with colour then the colour must be correct. We are trying to reproduce, within the limits of the photographic process, the original scene. As with everything in grading this needs to be qualified. There are occasions when the customer does not want an exact reproduction of the original scene. For example when a scene is shot Day-for-Night, that is a scene is photographed during the day and needs to look like night.
The shadows are the darkest areas of the scene; they will appear lightest in a negative. The highlights are the lightest areas in the scenes, the darkest in the negative. A dark suit would be a good example of a shadow area and a white shirt a highlight area.
The contrast of a film determines the number of grey tones between white and black. High contrast film will not have any grey tones, just black and white. A low contrast film will have a large number of grey tones.
The general principles of grading apply to sight or VCA grading. So in the following the principles of sight grading are discussed but it can be assumed that they will apply to analyser grading particularly as many graders make corrections on an analyser-graded first print by sight grading.
It should be a guiding principle for graders to keep the amount of grading to a minimum. It is tempting for inexperienced graders to want to change the light for every scene. To some extent this has been brought about by the practice of laboratories having the negative preparation department pre-notch or cues every scene before giving the negative to the grader. This was so that the grader can concentrated on grading and not worry about notching the scene with the possibility of damaging the film. The inexperienced grader then assumes that because there is a notch that a different light is required for every scene.
Grading is carried out by mentally comparing the scene in front of you with a standard scene that will print at the middle of the printer scale. Some laboratories have their standard setting at a point below the midpoint of the scale because the grader is more likely to require high lights for overexposed scenes than low lights for underexposed scenes. If a scene is underexposed then the resultant negative will have loss of detail in the shadows. No matter how low a light you use you can never bring out detail that is not there. Using a low light will give a print that is washed out and thin without a good black. Unless we are dealing with a technical film or a newsreel where information from the image is more important than picture quality we will get a more pleasing result by keeping the blacks black and perhaps sacrificing a little shadow detail. The cameraman produces day-for-night by deliberately underexposing to lose shadow detail and the grader keeping the print dark. He has to be careful not to include the sun!
The grader has to keep his mental image of the standard scene in his mind all the time he is grading. He also has to assume that the control is keeping the printers and process on aim. It is impossible for a grader to get a good result if he is not sure that a particular light will always give the same result.
Sometimes customers will talk about TV grading or theatrical grading; there is no such thing. A film can only be correctly graded. A print for TV is sometimes required slightly lighter and with lower contrast. If the print is required slightly lighter then the correction is made on the printing machine. It is extremely difficult when you are grading to look at a scene and decide on light 22 and then make a mental calculation that the right light is 20. It would also mean that a second set of grading would have to be kept for theatrical grading. Eventually the wrong grading will be used. We produce the lower contrast by shortening the processing time.
The first decision to be made is which printing machine to use and whether to print the film forwards or backwards. If the film is single perforated 16mm then we do not have a choice because the film will only run one way on the printer just as in a projector. 35mm can be printed either way.
Which printing machine is used will depend on the type of work being done. Is a negative or a print or a duplicating positive being made? In some laboratories different machines are used for different stocks. The condition of the film will also help to inform the decision about the appropriate machine. Some machines are not able to handle shrunken film.
The direction is decided upon by checking a number of factors. The type of cues we are using has to be selected. This will depend on the systems available on each printer; some laboratories use only one type of cueing, for example FCC.
If RF Cues are used and the film is already cued for a backwards run then it is sensible to print the film backwards. The condition of the film is also a deciding factor. If the film is badly shrunken then it might have to be printed forward to avoid the shrunken picture appearing in the sound track area.
Most 35mm printing machines have adjustable or interchangeable gates usually known as masks. The usual gate is a five-way gate; full aperture or silent mask, forwards-picture mask, backwards-picture mask, forwards-sound mask and backwards-sound mask. The grader must specify which mask to use and that depends on what we are printing.
The first light on a film is usually the Academy Leader and often has one or more grey scales or step wedges cut in to it. Many laboratories have their own wedge that they cut into each film. This can be measured on a densitometer to ascertain whether the print density is right this assumes that the wedge has been given a known standard light. If the process or printer varies then this wedge will be wrong. It is good practise to always give the leader a standard light even if your laboratory does not use a wedge.

We can now commence to grade the film. The first scenes are likely to be title or even a censor. Both of these are often shot on clear base high contrastfilm stock. We have to judge the exposure so that the white are white and the blacks are black. Because we are dealing with high contrast material the exposure is quite critical. Too much exposure and the whites will ‘fill-in’ and too little and the blacks will be grey. A couple of lights less than the mid light should be about right for normally exposed titles. If they are super-imposed titles then we also have to consider the background. Superimposed titles will be on duplicate negative stock and will have a normal contrast so we have more latitude. Duplicate negatives are almost always heavier than a camera negative. This is because the duplicate negative must produce the same tonal range as a camera negative. A camera negative is exposed so that the shadows are on the toe of the curve. When a print is made and the shadows then appear on the shoulder of the print stock the final result is a close reproduction of the brightness range of the original scene. In order to retain the close reproduction the duplicates must be printed on the straight-line portion of the curve.
As we make our way through the film we must examine each scene to determine how much detail we want in the highlights or shadows. We will always check the scene in several places in case the shot involves a pan or tracking shot and the exposure varies through the shot. We also keep in mind the previous scene so that we can maintain an even balance through the film. It is often said that you should grade for flesh tones. From a colour viewpoint this might be true but in general you must grade for the highlights and shadows and largely ignore the skin densities. Obviously there are shots for example where the director wanted the face in silhouette then we ignore the shadow detail and make sure the face is as the director wanted. A great difficulty for a grader working in the archive field is that the director’s instructions for grading are no longer available and most likely neither is the director! We then have to interpret the film as we hope the director wanted, although we usually have a client who is going to decide how he wants the film graded.
Once we have completed the grading for the film or reel then we have to produce the appropriate bands for it. We can then send the film to be cleaned and printed.
It is essential for a grader to see as much of his work on the screen as is possible. He can then learn where he is making errors and to equate his view of the negative over the bench with a picture on the screen. The only way to become and stay a good grader is to have lots of practice with a continual self-appraisal by viewing as much of your work as possible.
If you are interested in Grading you might also be interested in the page on Cueing.
Colour Grading using an Additive Head:
 This picture illustrates what alterations you have to
make when grading Reversal to Reversal and when grading Negative to Positive.
This picture illustrates what alterations you have to
make when grading Reversal to Reversal and when grading Negative to Positive.